User Management from the Admin Portal
Manage user accounts and permissions directly from the Users tab in the Admin Portal.

Written by Owen Parry
Updated at April 2nd, 2024
Table of Contents
From the Users screen in the Admin Portal, you can create, remove, reset password, reset 2FA, set Roles, and set Company Access. All users are required to setup 2FA before accessing the Admin Portal.
To get started login to the Web Admin Portal at https://msp.autoelevate.com as an Admin Portal Administrator using your email address and AutoElevate password. Click on “Users” in the left-hand column.
To Create a New User
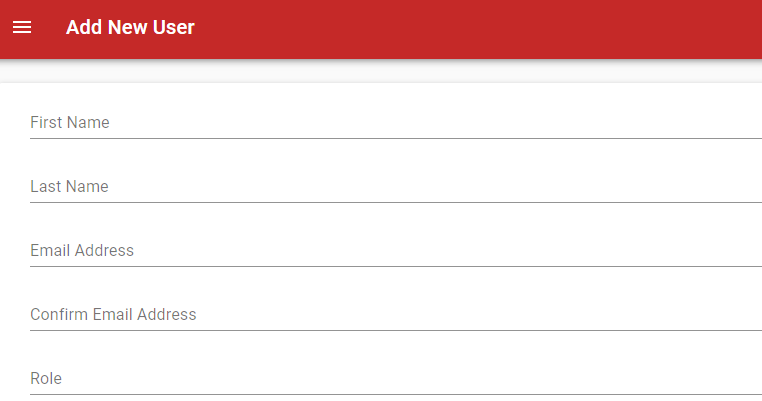
Navigate to the top of the Users screen where it says “Users” click the “+” symbol and you will then be able to fill in the necessary information set up the new account.
Fill in the fields for First and Last name. Enter and confirm their email address, where then an email will be sent to the user to set up their password (can’t already exist on our system). Choose the user Role and set Company Access options.
Note: When entering an email address outside of your common domain, a confirmation dialog box will pop-up asking you to confirm this is correct. We’ve added this for additional security measures for common mistakes when administrators set up their user accounts.
Adding Multiple Users
In cases where you are adding multiple users, simply add the user and just click “Save”. This will create the user but prevent the email from being sent and will bring you back to the Users grid. From there, select the users by clicking the Checkbox and then from Actions -> ‘Set Initial Password’

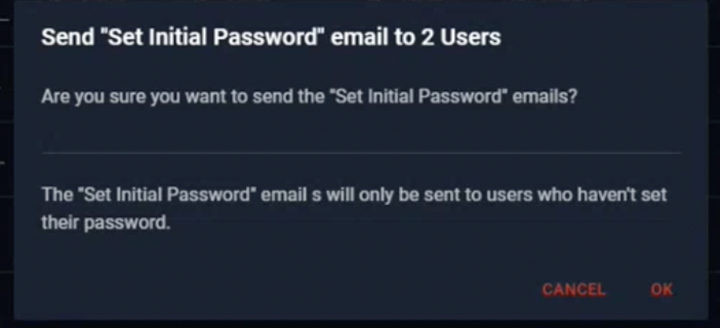
This will send an automated email to the users where they can click on the link provided and set up a password.
This option can be sent to multiple users at a time and will not be sent to the users who have already set up their initial password.
-
All tokens emailed by admins to another user will be set to expire in 72 hours. This is because the user may not be available to complete the process in a timely manner.
-
All tokens will be invalidated once used.
- If the user email has changed since the Initial Password Email was sent, the token will no longer be valid. This is to protect against an unauthorized person completing the process in the case that the admin has mistakenly sent the email to the wrong email address and subsequently has corrected their mistake by entering the correct email.
4 default Roles to choose from:
-
Administrator– Gives the user full access to the Admin Portal.
- Permissions: Users View/Add/Edit/Delete, Requests View/Edit, Rules View/Add/Edit/Delete, Advanced Rules Add/Edit, Computers View/Edit/Delete, Companies View/Add/Edit/Delete, Locations View/Add/Edit/Delete, Events View, Global Settings View/Edit
- Permissions: Users View/Add/Edit/Delete, Requests View/Edit, Rules View/Add/Edit/Delete, Advanced Rules Add/Edit, Computers View/Edit/Delete, Companies View/Add/Edit/Delete, Locations View/Add/Edit/Delete, Events View, Global Settings View/Edit
-
Technician (Level 3)– Allows the user to do all that an Administrator can do, however, User management is not available and global Settings can be viewed but not edited.
- Permissions: Requests View/Edit, Rules View/Add/Edit/Delete, Advanced Rules Add/Edit, Computers View/Edit/Delete, Companies View/Add/Edit/Delete, Locations View/Add/Edit/Delete, Events View, Global Settings View
- Permissions: Requests View/Edit, Rules View/Add/Edit/Delete, Advanced Rules Add/Edit, Computers View/Edit/Delete, Companies View/Add/Edit/Delete, Locations View/Add/Edit/Delete, Events View, Global Settings View
-
Technician (Level 2)– Has the same limitations of Level 3 but additionally limits the user from viewing global Settings, creating or editing Advanced Rules and from being able to edit or remove Computers, Locations or Companies. Allows the user full access to do request approvals and denials and for creating and managing rules at all levels but does not give the user visibility to the user management screens.
- Permissions: Requests View/Edit, Rules View/Add/Edit/Delete, Computers View/Edit, Companies View, Locations View, Events View
- Permissions: Requests View/Edit, Rules View/Add/Edit/Delete, Computers View/Edit, Companies View, Locations View, Events View
-
Technician (Level 1)– Has the same limitations of Level 2 but additionally limits the user to only doing 1-Time approvals and denials for requests. This Role does not allow the user the ability to create or manage rules.
- Permissions: Requests View/Edit, Rules View, Computers View, Events View
3 sets of Company Access:
-
All– Gives the user the ability to view, access, approve/deny requests, and create/manage rules for all companies.
-
Most– Gives the user ability to view, access, receive notifications, approve/deny requests, and create/manage rules for all companies except for the specific companies listed. This might commonly be used to prevent a technician from doing approval/denials on their own system by selecting the MSP’s own internal Company as the exclusion. Note: When this level is selected, the user does not have access to create/manage global rules at the "All Companies" level.
- Some– Gives the user ability to view, access, receive notifications, approve/deny requests, and create/manage rules for only the specific companies listed. This might be commonly used to give an external user from a company site access to only their Company but no others. Note: When this level is selected, the user does not have access to create/manage global rules at the "All Companies" level.
Once all fields and options have been set click ‘SAVE & EMAIL’ to create and notify the new user or just 'SAVE' to create and notify user at a later time.
Edit User Settings - User settings (including changing a user password) can be adjusted by clicking edit button (looks like a pencil) next to the user's name which will then allow you to make adjustments to the user setup. Once complete click “SAVE” to commit the changes.
To Remove a User - Click the 'Trash can' next to the user's name and then confirm the deletion when the confirmation dialog appears.
** Please note that currently the Admin Portal does not send out an email or notification when a User account is created or changed. This is something that if desired you will need to communicate to your user directly **
Other User Actions
From the Actions menu (at the top) you can remove a users password, reset a user's 2nd Factor Authentication, reset the password, re-send initial credentials, and Link AutoElevate users to user accounts to your PSA ticketing system. (Note: AutoElevate matches the user's email address to the email address of the user in the PSA ticketing system.)
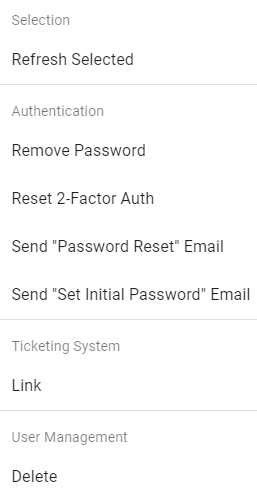
To Remove Password - check box next to the User(s) and then from the "Actions" menu select “Remove Password” to enforce SSO. This will remove the current password the user(s) logs in with. See here on SSO.
To Reset 2nd Factor Authentication – check the box next to the User(s) and then from the “Actions” menu under ‘2-Factor Auth’ select “Reset”. After the reset, the User(s) will need to, logout, log back in to the Admin Portal after which they will be prompted to go through the 2FA setup process again.
To Reset Password – check the box next to the User(s) and then from the “Actions” menu under ‘Send "Password Reset" Email'. After the reset, the User(s) will receive an email with a link to reset their password, which expires after 10 minutes.
To ‘Link’ an AutoElevate user account to your PSA ticketing system – check the box next to the User(s) and then from the “Actions” menu under ‘Ticketing System’ select “Link”. (Note: for this functionality to work your AutoElevate system requires Integration to your PSA ticketing system which also may incur a setup fee – for integration please ask your account manager for details or email sales@autoelevate.com )